Inserting Signatures and Other Images as Headers & Footers
CATalyst can add images to a transcript using the Headers & Footers pane in the layout. This could be an image of the witness, the address of your agency, or most commonly, your signature for the certificate page. Adding an image to your layout or include file is quick and easy and the image will remain in your layout until you decide to remove it.
Insert an Image
-
Do one of the following:
In Edit, click Format, Modify Layout (Alt-o, L). The Layout pane opens.
Click Function, Layout (Alt-u, L). In the Open Existing Document dialog box, select a layout and click Open.
-
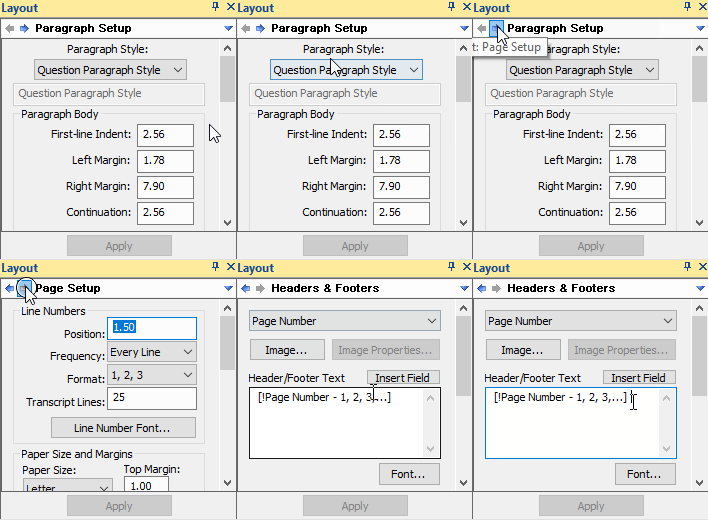
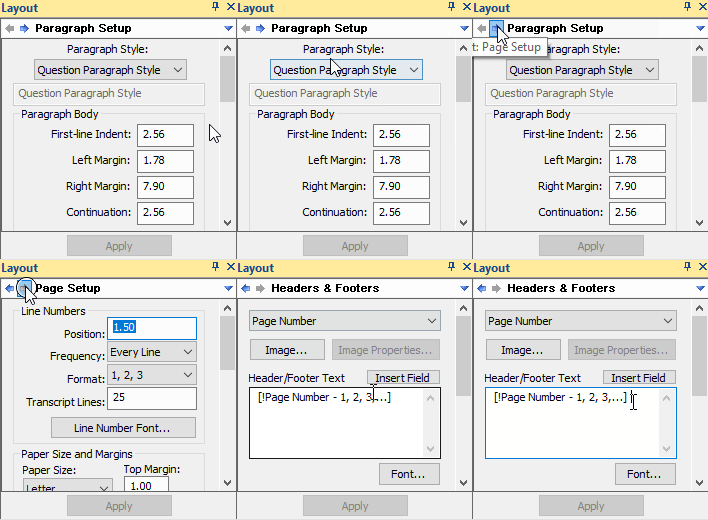
At the top of the Layout pane, you'll see Paragraph Setup with two arrows to the left of it. Click the right arrow twice to go to Headers & Footers.
-
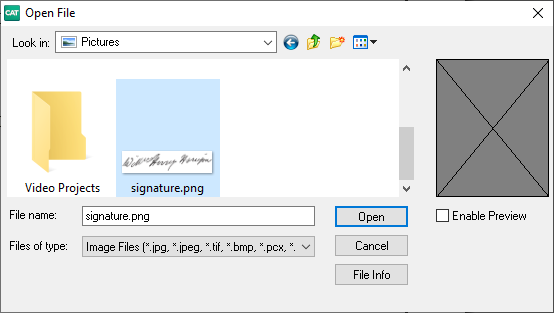
In the Header Selection field, choose a header line to associate with the image and select Image. Header 7 is a good option as it is one of the least used header lines. The Open File dialog box displays.
-
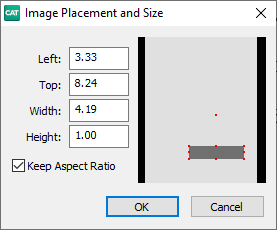
Browse to the location of your image, left click on the image, then click Open. The Image Placement & Size dialog box displays.
-
The Image Placement and Size dialog box allows you to set where the image appears on the page. Type the measurements for where the image should appear and it's size then press OK.
The Placement Preview Window will show where the image will be placed as you adjust the measurements. You can place the image anywhere on the page. If you do not set placement values, the image will be placed in the upper left corner of the page.
You can make adjustments to the following settings:
Left
This value determines how far from the left side of the page the image is placed. The position is a measurement taken from the left edge of the paper in inches or centimeters, depending on your setting. It is typed in decimals. For example, ½ half inch is typed, .5.
Top
This value determines how far down from the top of the page the image is placed. The position is a measurement taken from the top edge of the paper in inches or centimeters, depending on your setting. It is typed in decimals. For example one inch is typed, 1.0.
Width
This value determines the width of the image. The measurement is in inches or centimeters depending on your setting. It is typed in decimals. For example 1¼ inch is typed, 1.25.
Height
This value to determines the height of the image. The measurement is in inches or centimeters, depending on your setting. It is typed in decimals. For example 3½ inches is typed, 3.5.
Keep Aspect Ratio
Check this box to maintain the image ratio of width to height. When you make a change in one of the Width or Height fields, CATalyst automatically determines the value for the opposite field.
If you check this box and make a change in both the Width and Height fields, CATalyst uses the value in the Height field to determine image ratio. If you uncheck this box, the Width and Height fields would need to be set individually.
Placement Preview Window
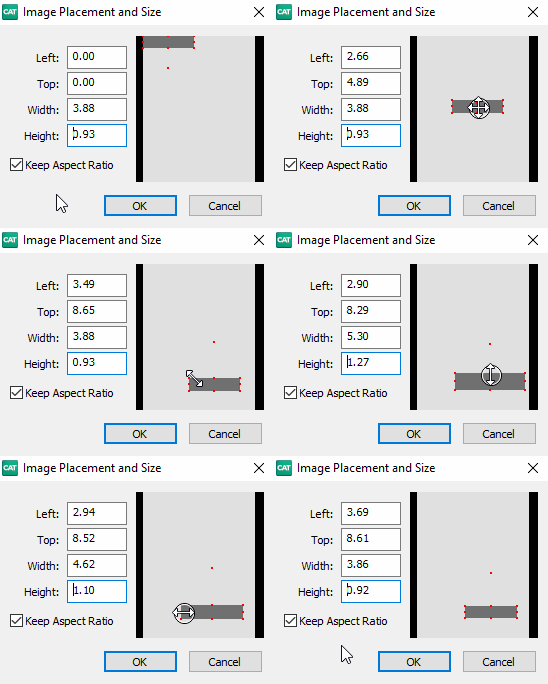
The Placement Preview Window displays a preview of the image size and position on the transcript page. You can use your mouse in this window to resize or move the image.
To resize the image, move your mouse over the image until a line with arrows on each end displays. You can position the mouse so that the line is vertical to modify the height; horizontal to modify the width; or diagonal to modify both the width and height. Hold the mouse button down and move the mouse to modify the image size as desired. As you move the mouse, the values in the Width and Height field reflect the changes.
To reposition the image on the page, move your mouse over the image until a cross with arrows at the end of each line displays. Hold the mouse button down and move the image to the desired position. As you move the mouse, the values in the Left and Top field reflect the changes.
Click Apply and the Apply this change to dialog box displays. Select the scope of the change then click OK. If you need to modify the image, click the Image Properties button and repeat step 5 or follow the Modify an Image, section of this article.
Modify an Image
-
Do one of the following:
In Edit, click Format, Modify Layout (Alt-o, L). The Layout pane opens.
Click Function, Layout (Alt-u, L). In the Open Existing Document dialog box, select a layout and click Open.
At the top of the Layout pane, you'll see Paragraph Setup with two arrows to the left of it. Click the right arrow twice to go to Headers & Footers.
In the Header Selection field, select the header line that contains the image you want to modify and click Image Properties. The Image Placement and Size dialog box displays.

Make any adjustments necessary and then click OK. Refer to Step 5 of the Insert an Image section for information about the Image Placement and Size dialog box.
Click Apply and the Apply this change to dialog box displays. Select the scope of the change then click OK.
Remove an Image
-
Do one of the following:
In Edit, click Format, Modify Layout (Alt-o, L). The Layout pane opens.
Click Function, Layout (Alt-u, L). In the Open Existing Document dialog box, select a layout and click Open.
At the top of the Layout pane, you'll see Paragraph Setup with two arrows to the left of it. Click the right arrow twice to go to Headers & Footers.

-
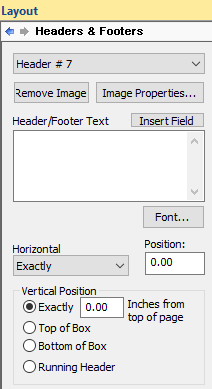
In the Header Selection field, select the header line that contains the image you want to delete and click the Remove Image button.
Click Apply and the Apply this change to dialog box displays. Select the scope of the change then click OK.