Setting Power Options in Windows 10
-
Left click on Start then Settings.

-
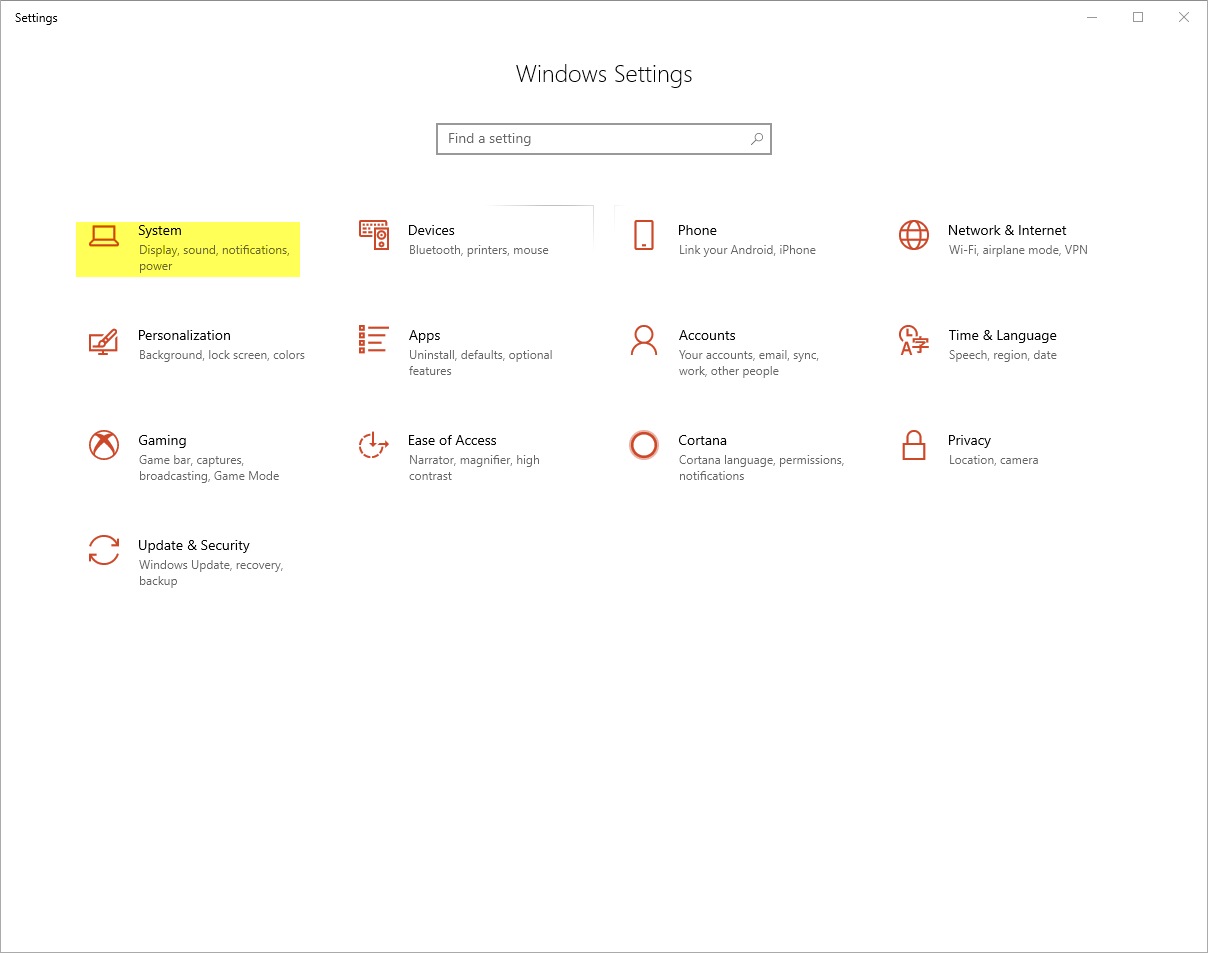
Left click on System.
-
On the left side left click on Power & sleep (yellow highlight).
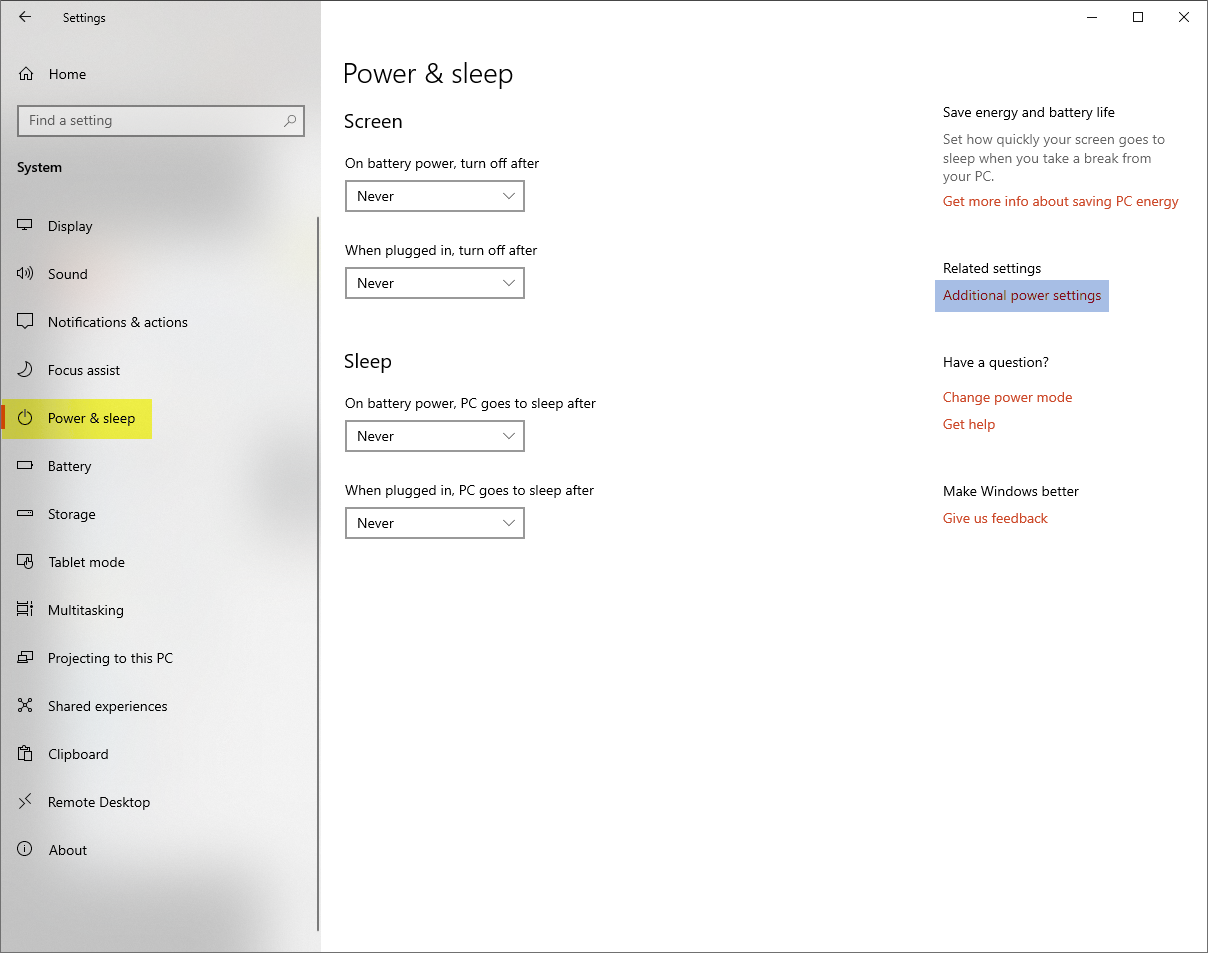
Left click on each drop down menu and click on Never. Do this for both the Screen and Sleep settings.
Now click on Additional power settings (blue highlight) on the right side. You may need to maximize the window to see this setting.
-
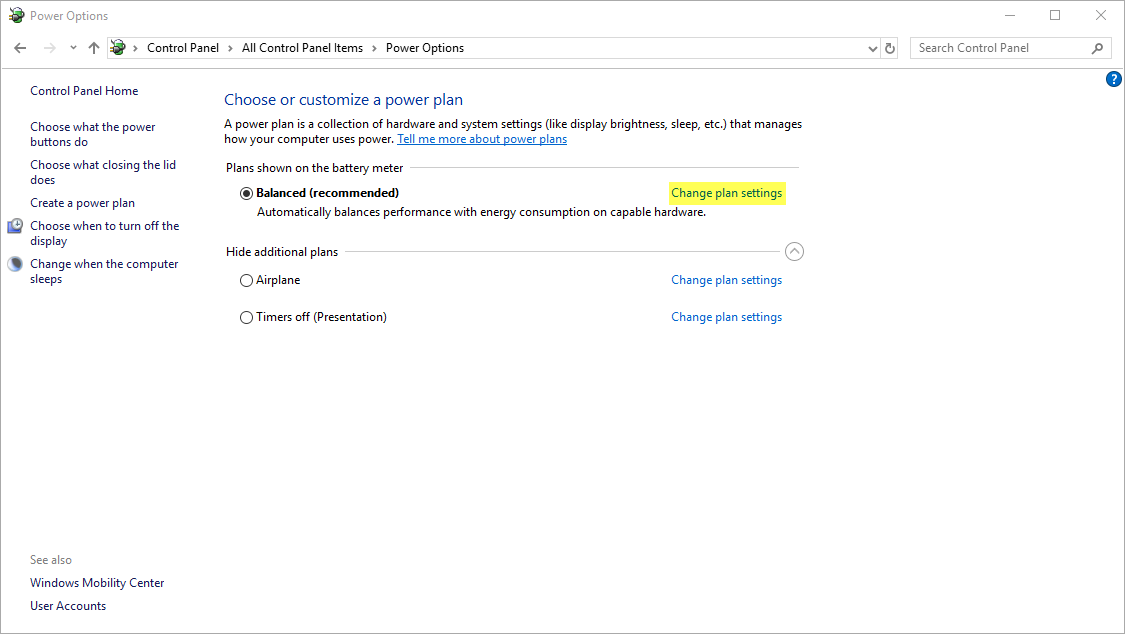
Click Change Plan Settings next to the selected Power Plan.
-
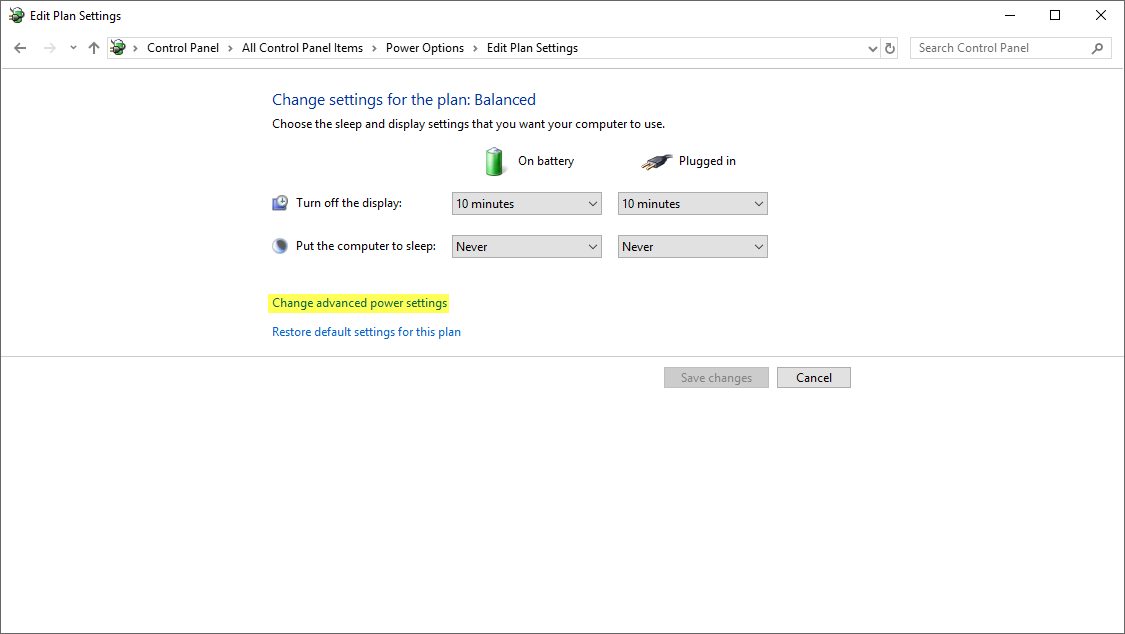
In the Edit Plan Settings window, click Change advanced power settings.
-
The Advanced settings window appears.
-
Scroll down until you find Hard disk and click the plus sign next to it. Then click the plus sign next to Turn off hard disk after.
NOTE: If your computer has a Solid State Hard Drive (SSD) you may not have this option. You can skip to the USB Options step.
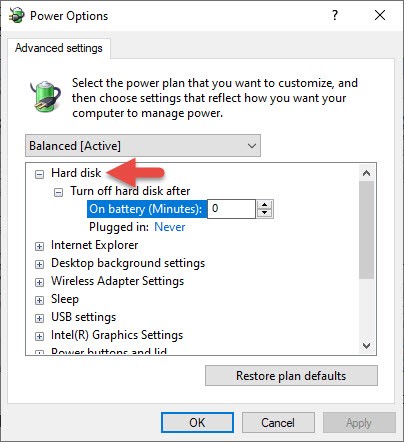
You will see two options: On battery and Plugged in. Click in each setting and change the (Minutes) to zero.
-
Now scroll down until you find USB settings and click the plus sign next to it. Then click the plus sign next to USB selective Suspend Setting.
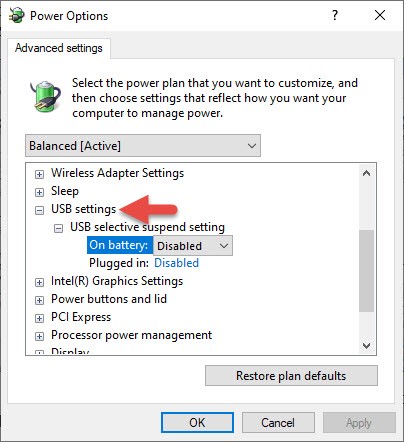
You will see two options: On battery and Plugged in. Click the drop-down menu on each and change to Disabled.
Click Apply, then click OK to close the window. You can also close the other Power Options windows.
-
Setting Power Options in Windows 11
-
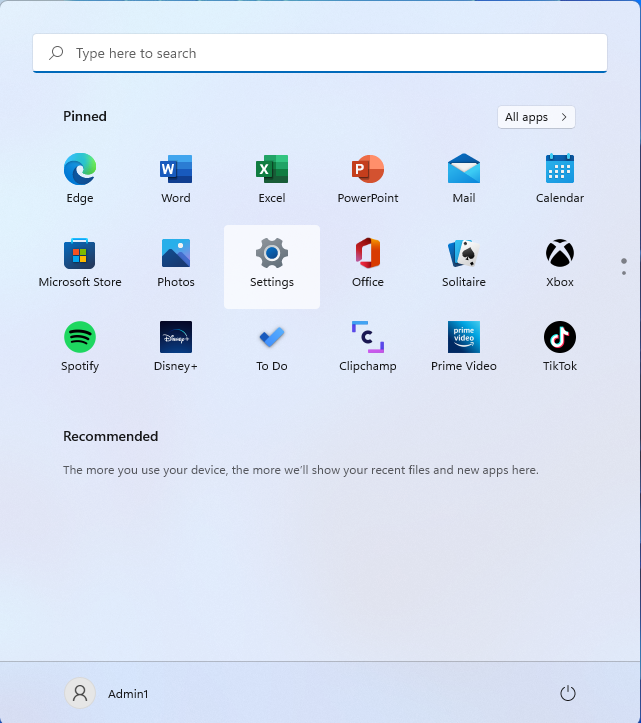
Left click on Start then Settings.
-
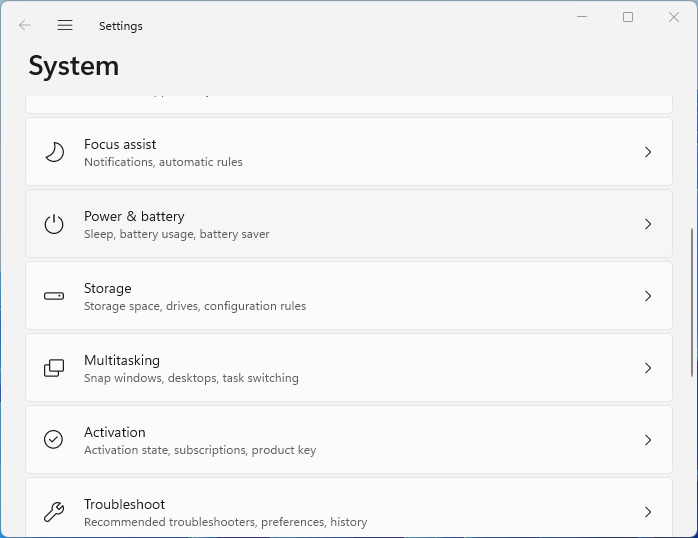
Left click on Power & battery.
-
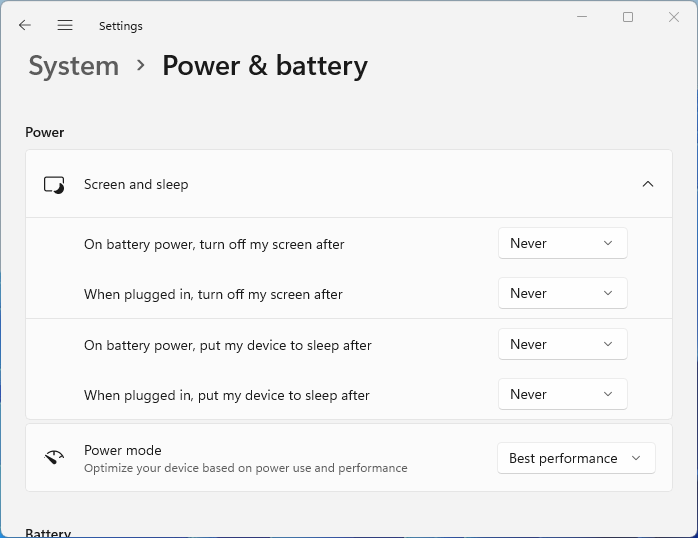
Under Screen and sleep, left click on each drop down menu and click on Never. Under Power Mode change the mode to Best Performance.
