Proceeding Room Introduction (Host Role)
This article explains how to navigate the Proceeding Room as a Host Role within the virtual proceeding platform.

Written by Dante Taylor
Updated at May 8th, 2025
Log into your account, you will be directed to the Dashboard. This is where you can view all proceedings and demo proceedings that you have scheduled or have been invited to.
-
To join the scheduled proceeding, click Join Now.

NOTE: By clicking Join Now, the platform will automatically direct you to a Connection Test before entering the Proceeding Room.
On the Connection Test page, you can verify your Camera and Microphone and that your system passed all the system requirements of the platform. Click the blue Use System Audio button to join the room using your computer's system audio.

-
Choosing Join and Use Phone For Audio will allow you to join the proceeding with your Mic permanently muted and your Speakers disabled, and drop the requirements for your device to have a camera or microphone. Please select this option if you are a Dial-In participant.
You will then be presented with the dial-in phone number and PIN before entering the room.

Once inside the proceeding room, you will have the option to enable the computer's system audio if you hang up the phone.
You also have the option to join using the "View Only Mode", which allows you to only view the exhibits shared while have access to the viewscript.

After the Connection Test is completed, you may enter the Proceeding Room.

-
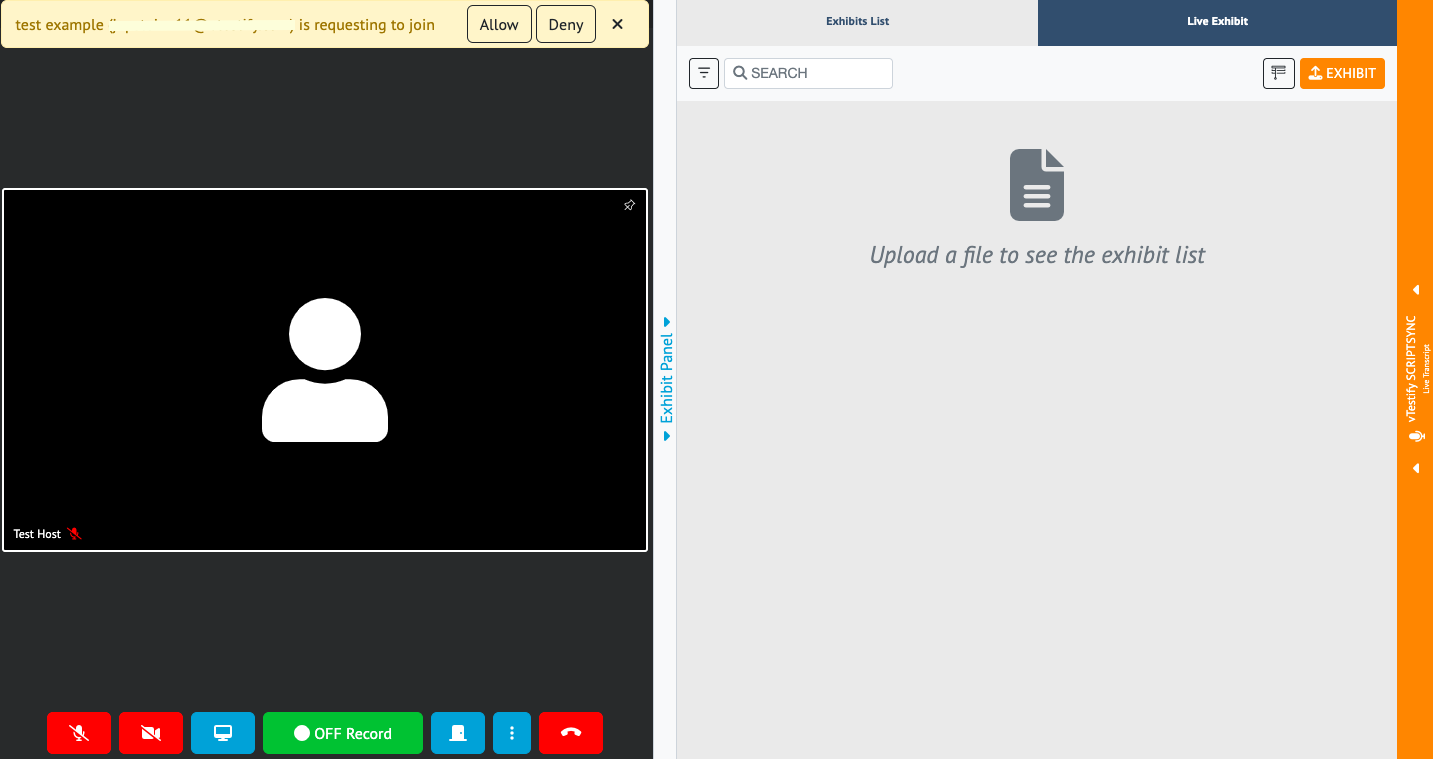
A User not on the attendee list for an upcoming proceeding can use the Request to Join Feature.
When a user uses a direct invite or the proceeding room URL link and is not invited to the proceeding, the Host and Co-Host will be notified of the request from within the proceeding room. For more information please see How-to Use the Request to Join feature (Host).
-
All attendees have the option to use the Background Blur Feature. This feature adds Background Blur to the video.
Click on the 3 dots context menu located next to the Red Telephone icon. Then click Blur My Background.
-
During a proceeding, attendees can connect through a Dial-In feature.
Click on the 3 dots next to the Red Telephone icon. Then click Use Phone For Audio where you will be able to view the Dial-In Number and the Pin Code.

A pop-out window will appear which will provide the dial-in number and PIN as well as a QR code that can be scanned with a smartphone.
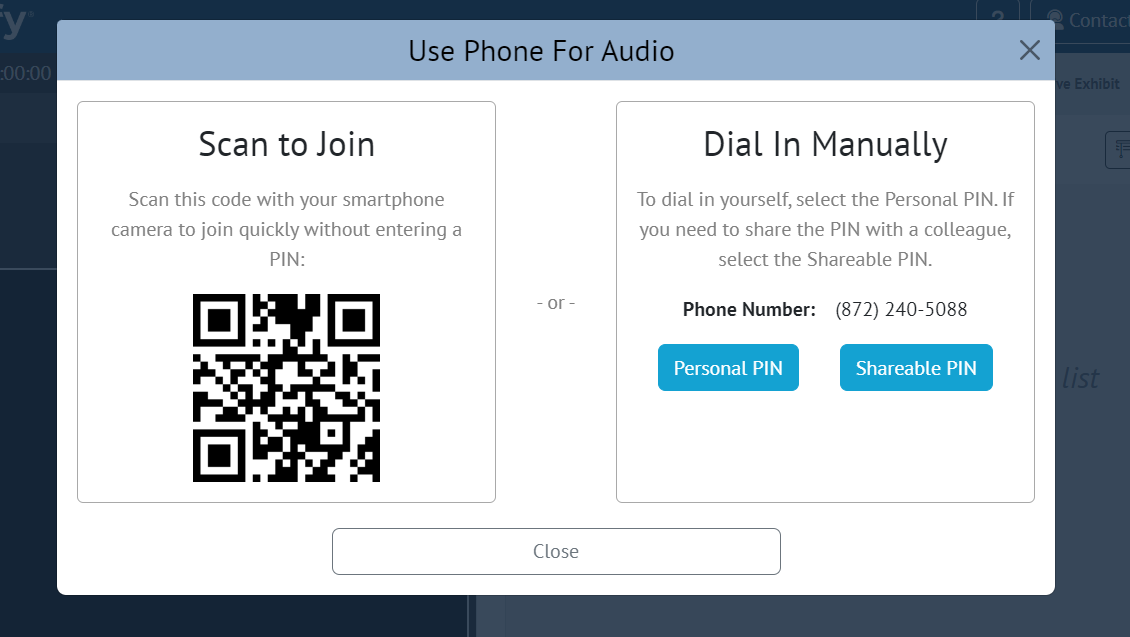
The Dial-in Conference call will be enabled by default. When attendees call in they will automatically be connected and will appear above the video screen.
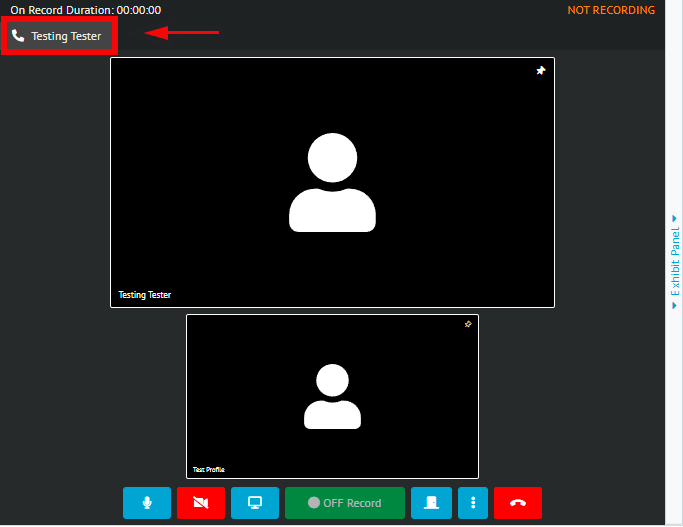
Joining Using Phone for Audio will automatically mute your mic and the speakers in the browser tab.
Once the call has been disconnected, the mic and speakers will automatically unmute.
You have the option to use the Pop-out Feature. This will allow you to pop out an attendee's video into a separate window. Please see How-to use the Pop-out Feature for more information
-
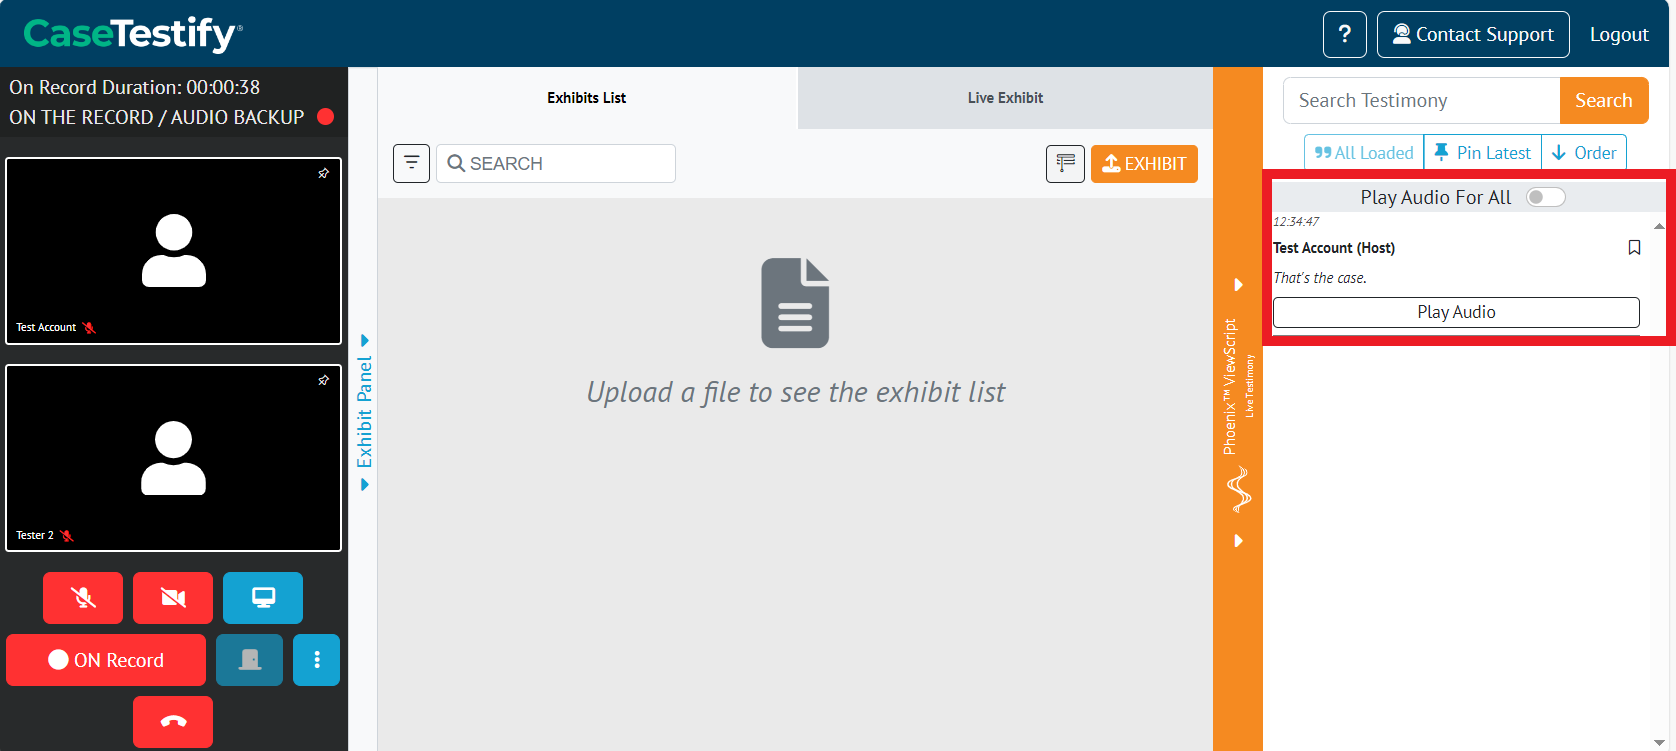
Once in the Proceeding Room, there are different features available to you
The Host Grants access to ViewScript. This feature functions only when the proceeding is being recorded
-
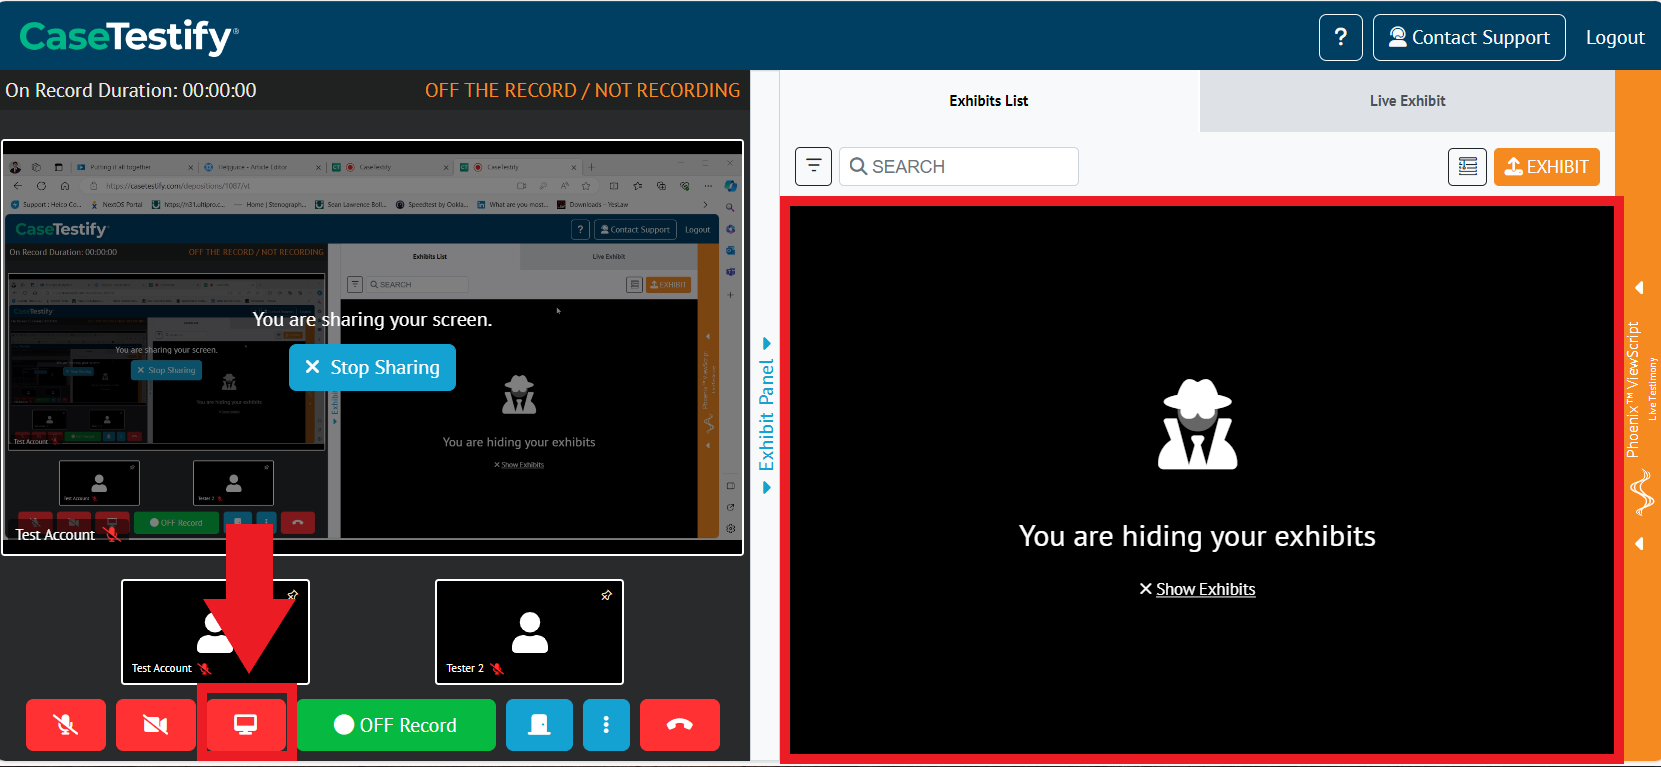
The Privacy Shade feature allows you to keep your exhibit list private while you are utilizing the Screenshare feature. Please see How-to Screen Share within a Proceeding
Starting a Screen Share will automatically enable the Privacy Shade over your exhibit list.
-
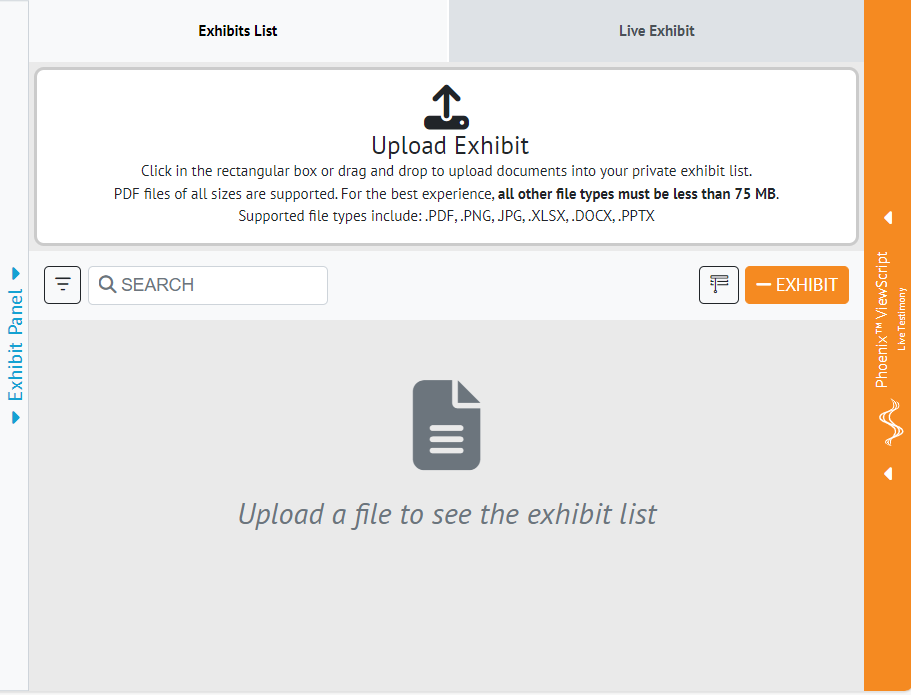
You can upload exhibits within the ‘Exhibit Panel’ by clicking the orange “Exhibit” button and uploading your files into the dropbox.
For further information on the exhibit features, see the following links:
Converting Old Office File Types to Supported File Types
How-to Upload an Exhibit Before and During a Proceeding
How-to Preview and Share an Exhibit with Others in a Proceeding
How Exhibit Permission Controls Work
If enabled, you also have the ability to use the Realtime speech-to-text feature. For more information please see How-to use the Realtime feature.
-
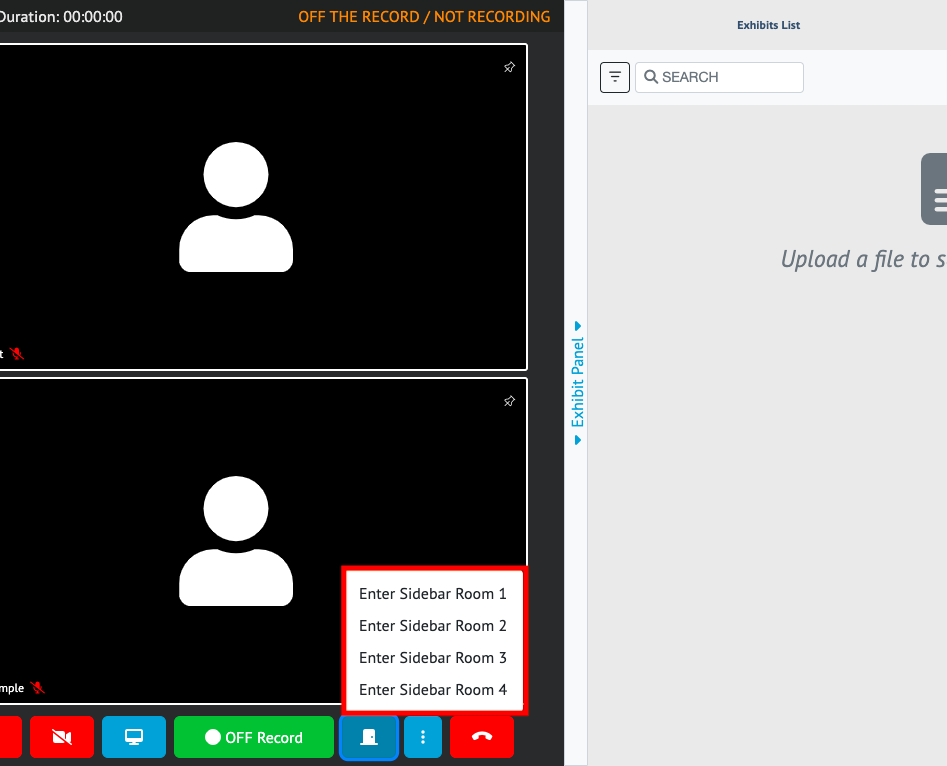
All attendees can access a Sidebar Room. Click on the sidebar icon next to the On/Off Record button. These are designed to have off-the-record conversations as these rooms cannot be recorded. All attendees have access to enter any of the four available Sidebar Rooms of a proceeding.
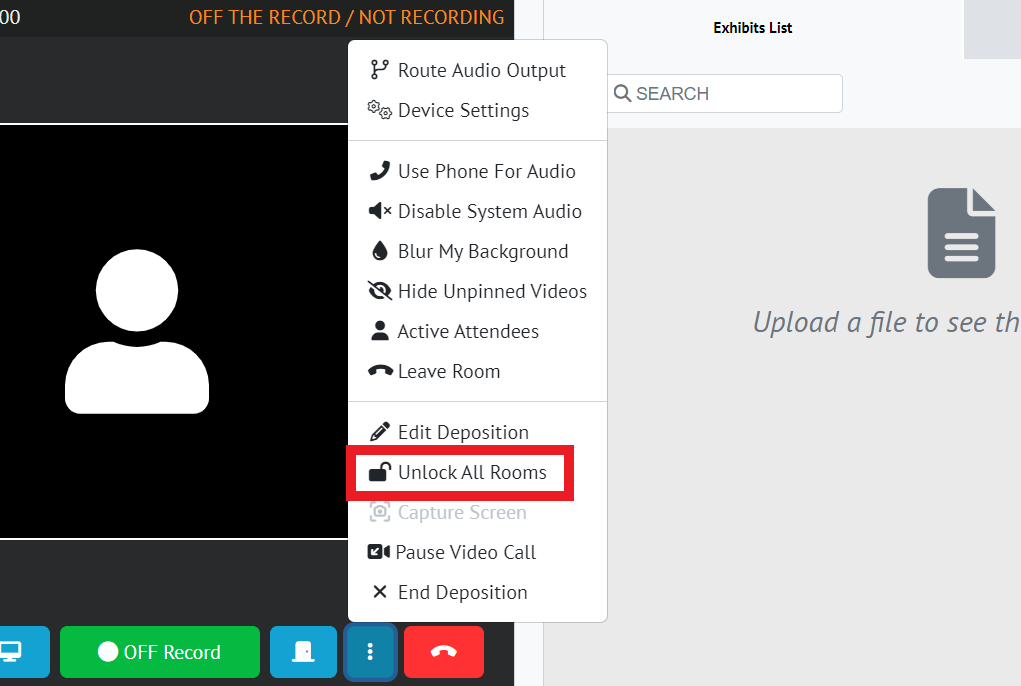
As the Host Role and Co-Host, you have a master key that allows you to unlock all of the Sidebar Rooms from the main Proceeding Room as needed.
-
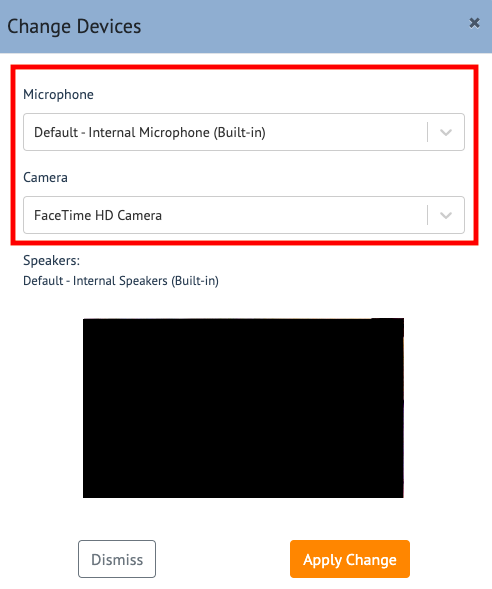
In the proceeding room, you can modify your Camera and microphone in use. To access this, start by selecting the 3 dots context menu next to the Red Telephone icon
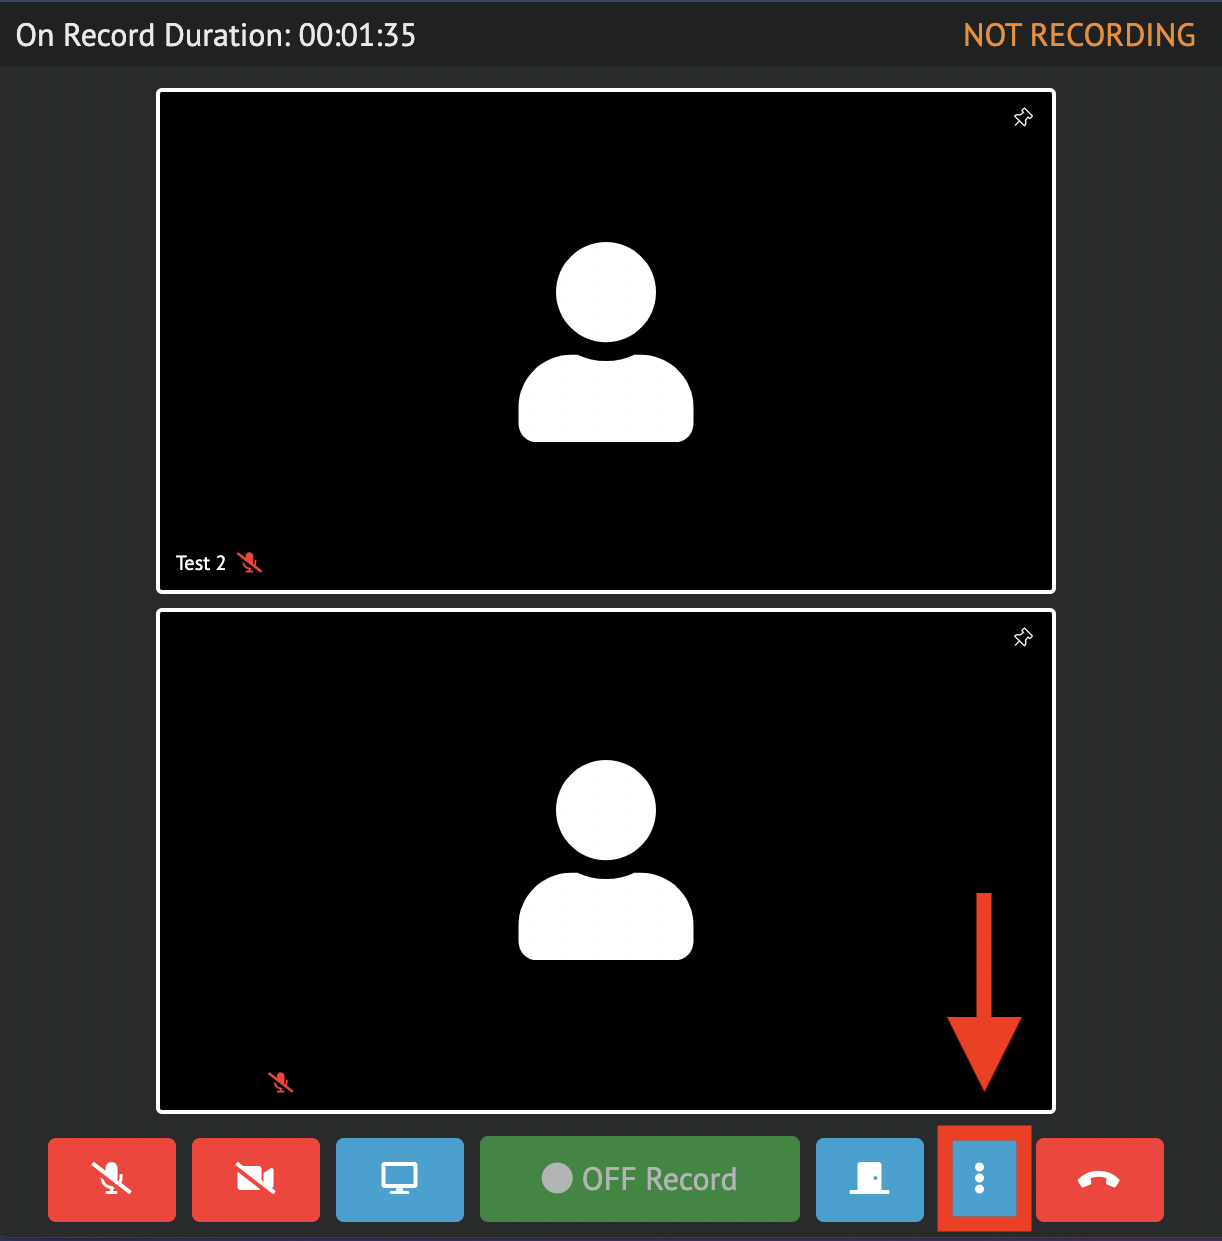
a. This will open a drop-down menu, click on Device Settings.

b. A pop-up window will appear, giving you access to modify either your Camera or Microphone to the desired option. Click Apply Change to save any changes made.
-
For users who are utilizing the Maxscribe virtual cable, Route Audio Output will allow users to connect with Casetestify seamlessly.
a. Select the correct channel and click Apply Changes