Disabling Exclusive Mode

Written by Justin Sieger
Updated at May 28th, 2024
Exclusive Mode is a Windows setting that that allows one program in Windows to use the audio. If another program wants to use audio, then either the audio won't play or the audio will not sound very good. When using CATalyst or MAXScribe, it is recommended to disable exclusive mode for your audio devices. Disabling this mode allows more availability of the audio device to more simultaneous applications. This must be done for each individual device.
Windows 11
-
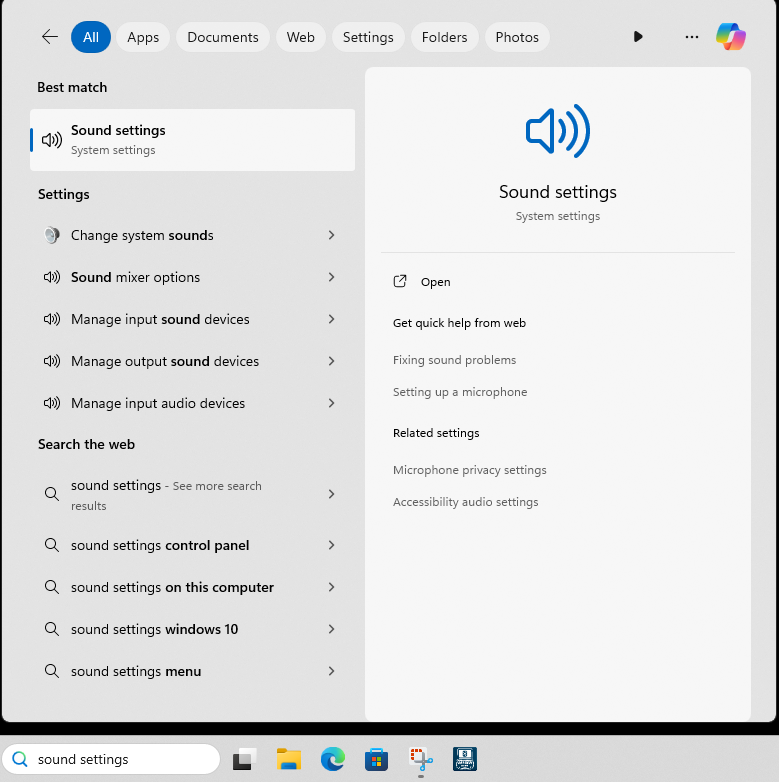
In the Windows Search bar, type “Sound Settings” and press Enter.
-
The Sound Settings window displays. Scroll down, past Output and Input and click on More sound settings.

-
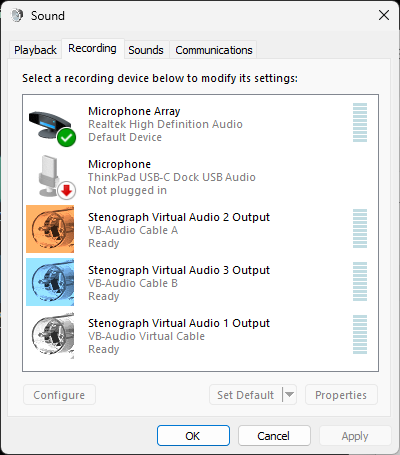
The Sound dialog box displays. Click the Recording tab and then double click on your default microphone.
-
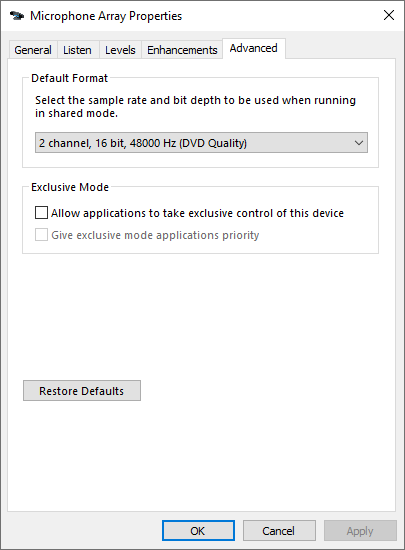
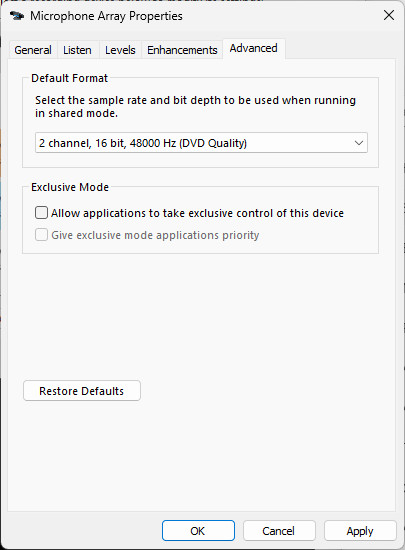
The Speaker Properties window displays. Click the Advanced tab. Uncheck Allow applications to take exclusive control of this device then click Apply then OK. Click the Speaker tab and repeat steps 3 and 4 for your default speaker.
There may also be an option, depending on your sound device, for Signal Enhancements or Audio Enhancements and a check box to Enable Audio Enhancements. Audio Enhancements may cause sub-par sound quality when playing back audio so it is recommended to uncheck this box.
Windows 10
-
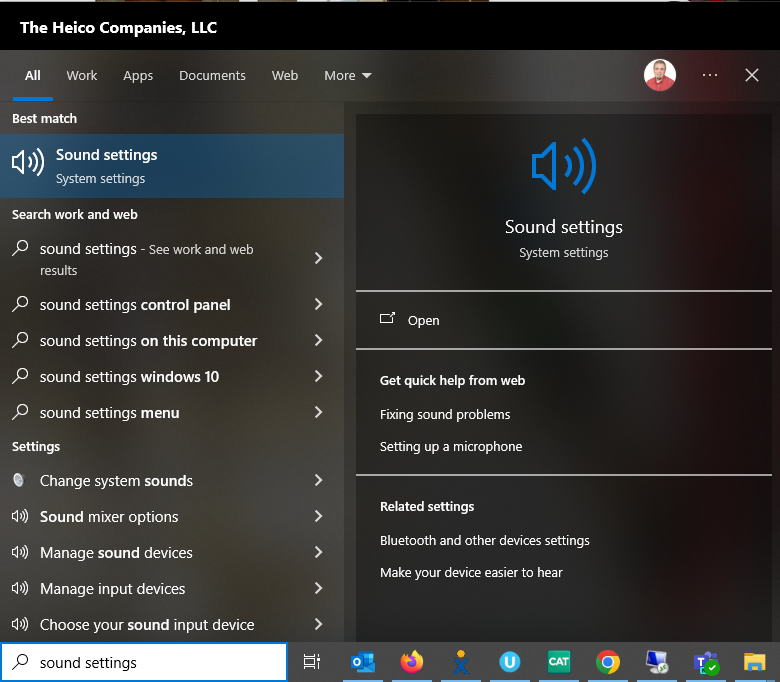
In the Windows Search bar, type “Sound Settings” and press Enter.
-
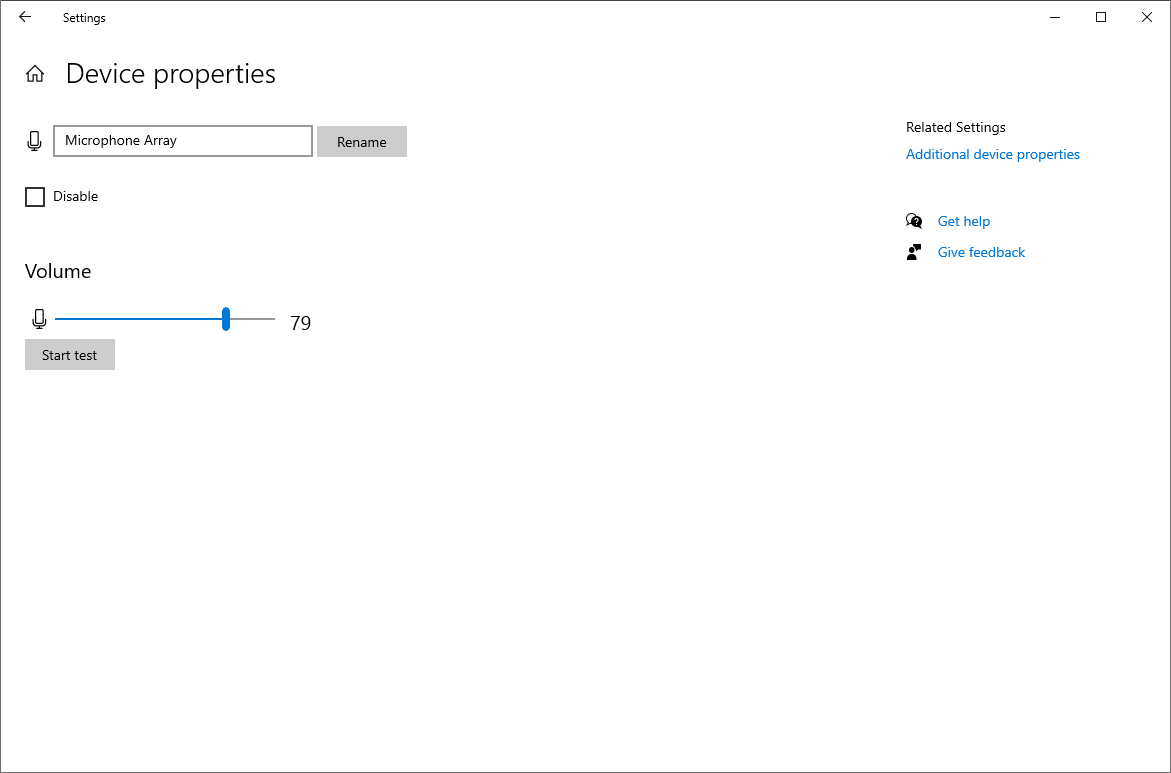
The Sound Settings window displays. On the right side under Input, click Device Properties underneath Choose your input device. The device might have the words “Microphone” or “Realtek” in the name.

-
In Device Properties, on the right side, click Additional device properties.
-
The Speaker Properties window displays. Click the Advanced tab. Uncheck Allow applications to take exclusive control of this device then click Apply then OK. You'll return to the Device Properties window. Click the back arrow in the upper left corner. Repeat steps 2, 3, and 4 for your default input device.
There may also be an option, depending on your sound device, for Audio Enhancements and a check box to Enable Audio Enhancments. Audio Enhancements may cause sub-par sound quality when playing back audio so it is recommended to uncheck this box.