CATalyst allows you to create a PDF of your steno note file in Manage Notes. When printed, the steno notes display in three columns. The beginning of each fold in the steno notes is highlighted. Timestamps, by default, are not included. You can change the number of columns that display and include timestamps by changing the settings in Manage Notes Options. To print multiple steno note files to PDF at once, use the Print Notes to PDF feature in Manage Jobs.
Print Steno Notes to PDF
In Manage Jobs, highlight the file you want to print then click Function, Manage Notes (Alt-u, n)
Once the notes are displayed on your screen press File, Print (Ctrl-p). The Print dialog box displays.
-
In the Printer Name field, select Stenograph PDF Printer.
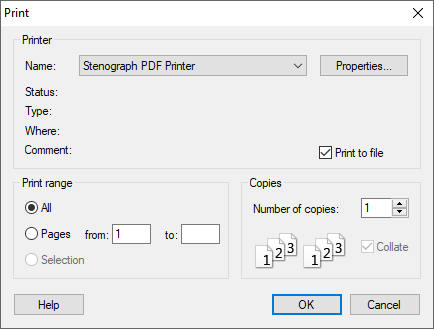
Make sure the Print to File Box is Checked then click OK
-
The Print to File dialog box displays. Select the location where you want to save the PDF file.
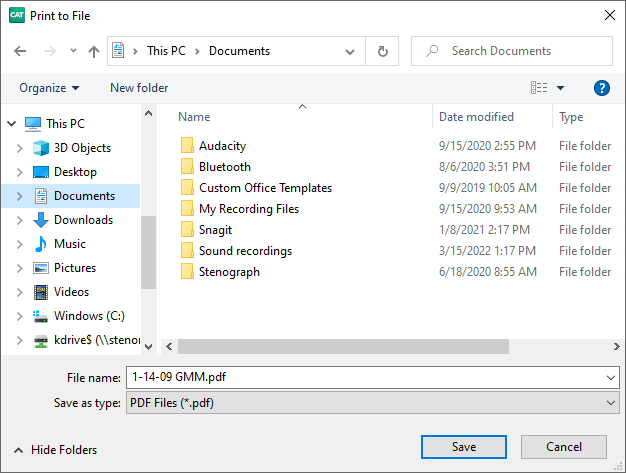
By default, CATalyst uses the original file name in the File Name: field. If you would like to use a different name, type a new name in the field.
Click Save to create the PDF.
Case CATalyst creates the PDF file and saves it to the selected location. You can view the file using a PDF viewer such as Adobe Acrobat Reader.
Print Multiple Steno Notes to PDF
The Print Notes to PDF feature in Manage Jobs allows you to batch print multiple steno notes files to PDF. By default, the steno notes display in three columns when printed. The beginning of each fold in the steno notes is highlighted. Timestamps, by default are not included. You can change the number of columns that print and include timestamps by changing the settings in Manage Notes Options.
-
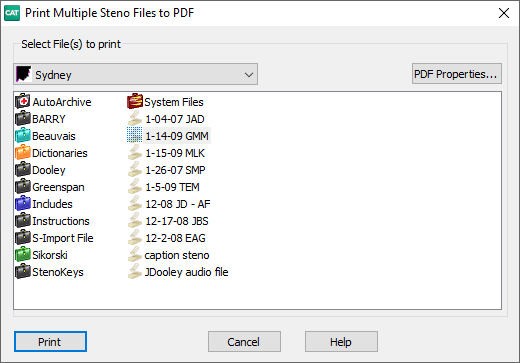
From Manage Jobs function, click File, Print Notes to PDF. The Print Multiple Steno Files to PDF dialog box displays.
-
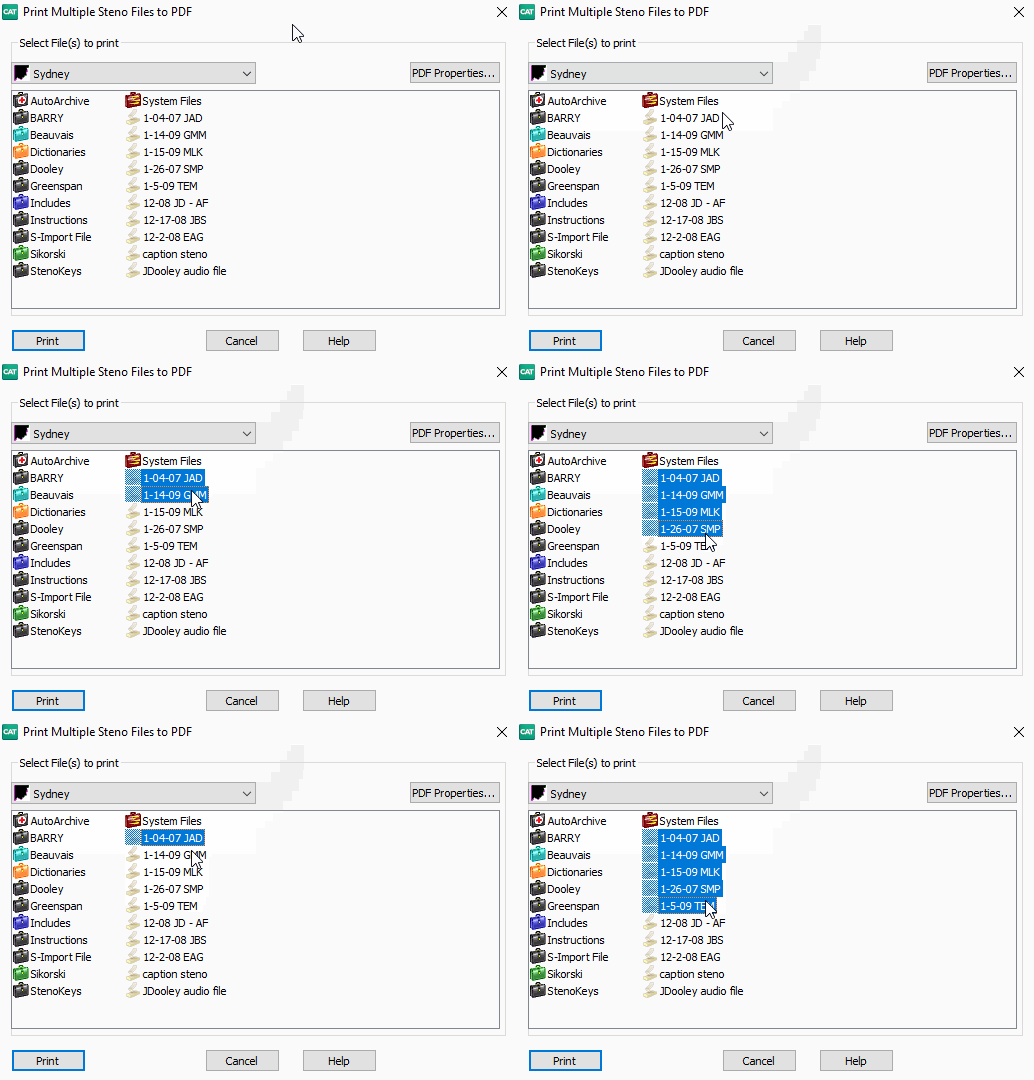
To select multiple files hold down the Ctrl key and left click on each file. To select a group of files, left click on the first file of the group, then hold down the Shift key and left click on the last file of the group.
-
To change the paper size and orientation, click PDF Properties. The default paper size is Legal and the default orientation is Portrait.
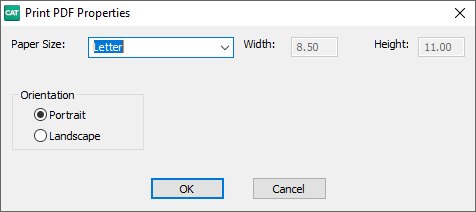
-
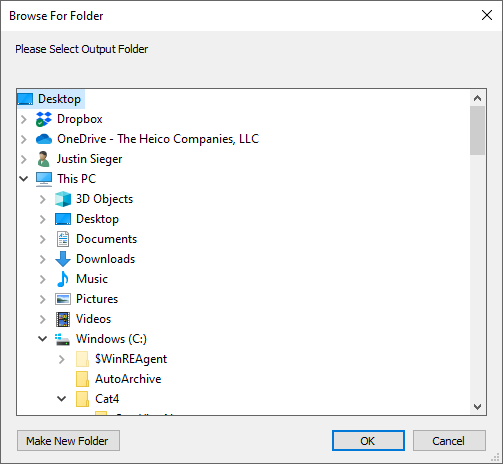
Click Print. The Browse For Folder dialog box displays. Select the location where you want to send the steno note PDF files and click OK.
Manage Notes Options
To change the timestamps, number of columns, or font, click Tools, Options, Manage Notes (Alt-t, o, m).
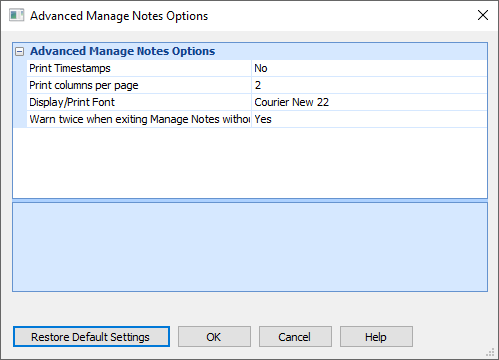
Print Timestamps - Select Yes to include timestamps or No to not include them. The default setting is No.
Including timestamps when printing steno notes affects the character size to steno notes. This option does not affect transcript printing.
Print columns per page - Changes the number of columns that a printed. Increasing the number of columns per page decreases the size and readability of the steno notes. Type the number of desired columns per page. The default setting is three.
Display/Print Font - Click into the box where the font type is listed and the 3 dots at the end of the line will appear. Click on the 3 dots and choose a font that is a fixed (mono) spaced font so the steno characters line up correctly as they would on steno paper), and Font Style.
Note: the Font Size is not controlled by this dialog box, is it determined by Print columns per page
Warn twice when exiting Manage Notes without saving changes - If you exit Manage Notes with unsaved changes to the note file, CATalyst will display a "Are you sure" message to exit without saving. If you do not want that extra warning when exiting without saving changes, select No. The default setting is Yes.