JAVS Audio Mixer Hardware Setup

Written by Justin Sieger
Updated at August 16th, 2022
This guide will show you how to setup the JAVS audio mixer. If this is your first time setting up JAVS or you're installing it on a new computer, you will need to install the audio drivers on your computer after you setup the mixer. A guide to installing the drivers can be found here and using the JAVS Configuration Tool can be found here.
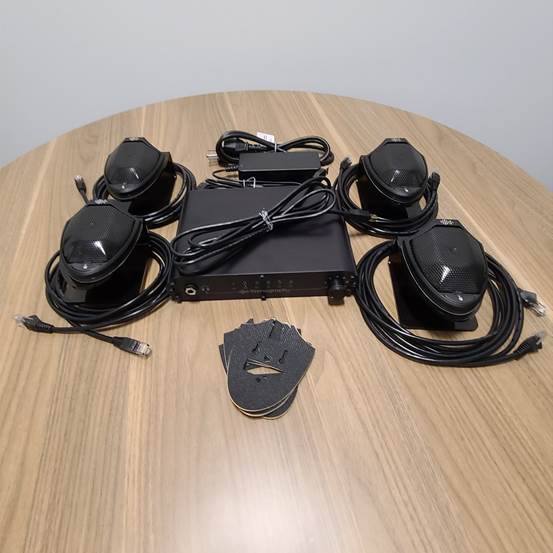
The JAVS Audio Mixer kit comes with the following:
1x JAVS P306b Audio Mixer
1x power supply
1x USB A to B cable
4x Audio Block Terminal covers
4x JAVS FlexMics
4x FlexMic pads
4x mic stands
4x Cat5 ethernet cables
Understanding the mixer
This section provides an explanation of the JAVS Audio mixer along with step by step instructions on how to connect the FlexMics to the mixer as well as connect the USB cable to your computer.
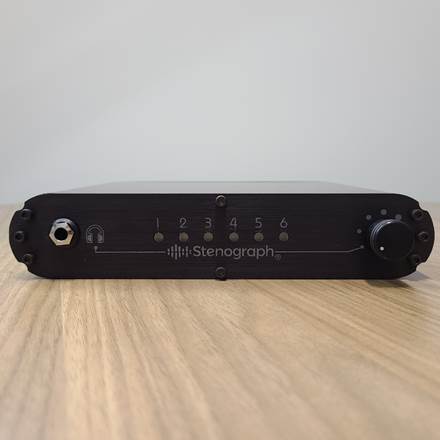
Front of the mixer
The front of the mixer, starting at the left side, has a 6.35mm headphone port to listen to the audio as it’s being recorded. If your headphones have a 3.5mm connector, like most headphones do, a 6.35mm to 3.5mm converter adapter can be used.
Next there are six LED lights corresponding to the six ethernet ports on the back of the mixer will light up when audio is being picked up from the FlexMics. If the LED is not lighting up, check the cable to the corresponding port and make sure it’s secure in both the port and mic.
Back of the mixer
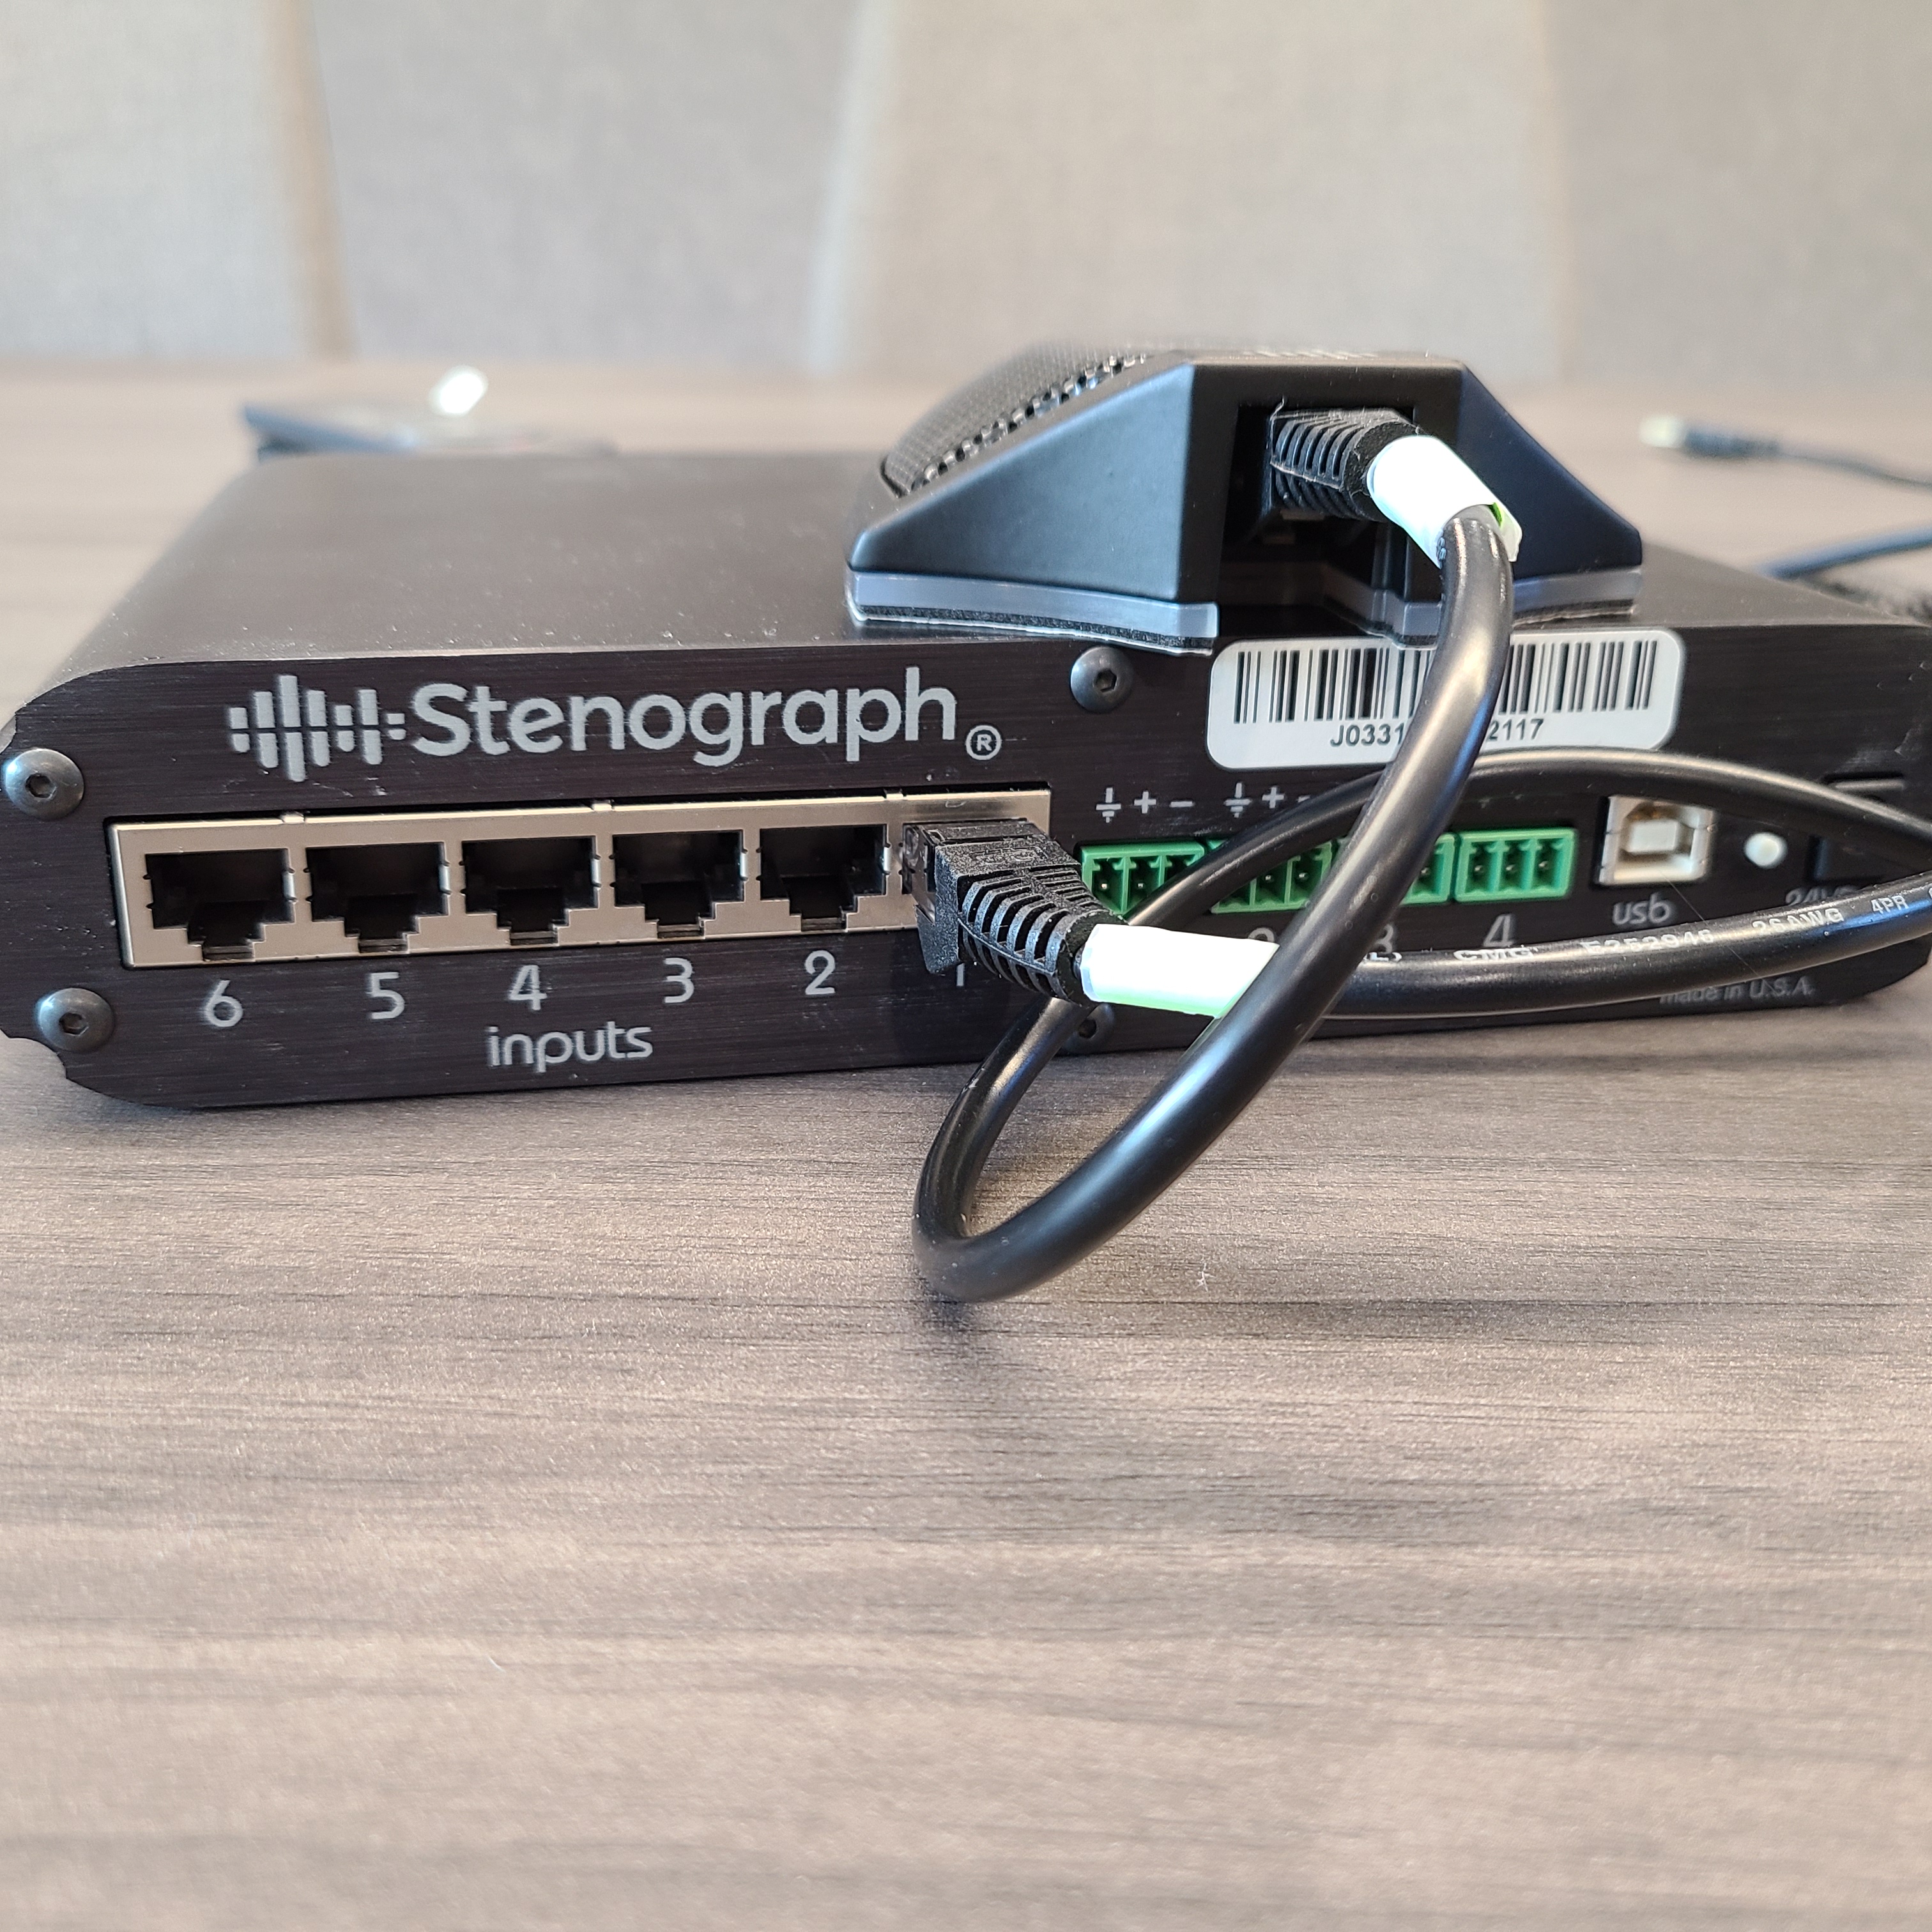
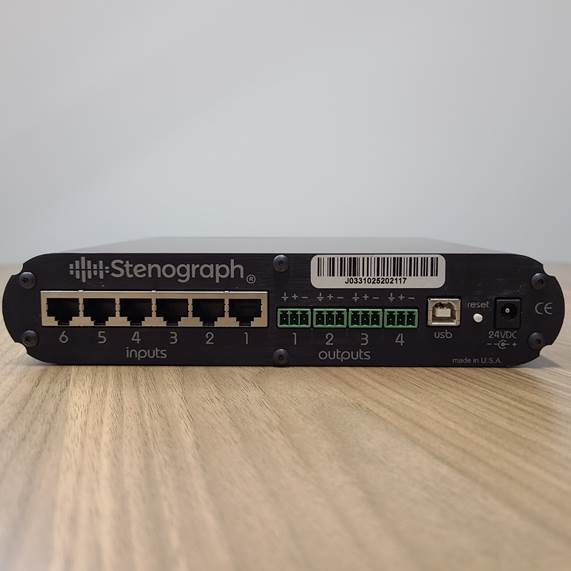
On the back of the mixer, again from the left side, we have six ethernet ports labeled 6-1. These ports are used to connect the ethernet cables to the FlexMics. When you connect a mic to one of the ports, the LED on the front of the mixer will light up indicating it’s receiving sound.
Next is the four audio block ports which are used to output to public address systems or other audio systems. These are not typically used for MAXScribe.
Finally, we have the USB port, power port, and reset button. The reset button can be used in the rare case the mixer becomes unresponsive. Simply hold the reset button for a few seconds then release.
Connecting the FlexMics to the mixer
Take one of the ethernet cables and plug one end into the back of one of the FlexMics, then plug the other end into one of the ethernet ports on the mixer. The mic with flash green for a second indicating it’s connected. Repeat this process for the remaining mics.
Tip: Place a colored sticky bookmark tab around the ends of the cables to make it easier to identify which microphone is plugged into which port.