The RealTeam Invite dialog box contains your contact information for RealTeam. The RealTeam Invite dialog box contains fields for an e-mail address, name, cursor/highlight color, an option to have defines the client makes added to your appropriate dictionary and a note area. The minimum information you need for a contact is an e-mail address although additional information may be useful.
For example, if you only want your scopists dictionary definitions added to your Global Table and not to your appropriate dictionary, you might want to deselect the Add to My Dict. option or you might use the Note field for the contacts phone number or alternate e-mail address. In addition to your contact information, the RealTeam Invite dialog box also allows you to invite contacts and see their current status. This information is also available in the Connected Users pane. Although you can add a contact at any time, it might be easier to add some contacts before starting RealTeam.
To add a RealTeam contact do the following:
-
Open an existing file and click the RealTeam Invite icon
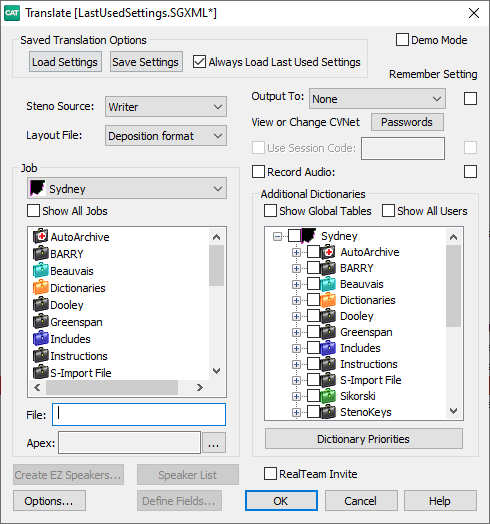
 or click File, RealTeam invite. You can also check the RealTeam Invite box under Translate when you start a realtime file.
-
The Invite dialog box displays. Click the New button to add a contact.
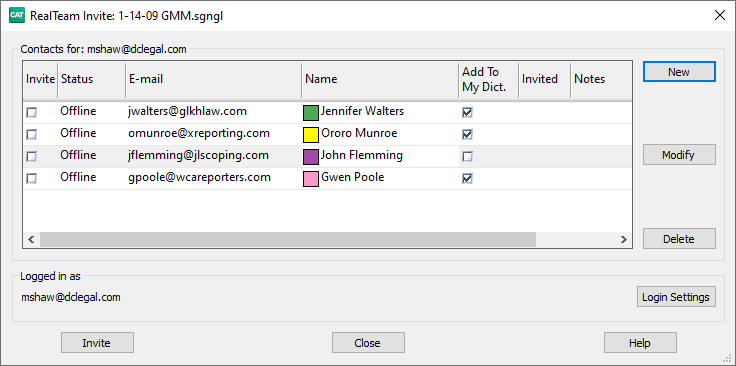
In the E-mail field, type the e-mail address for the contact. The e-mail address is the one they used when they signed up for their RealTeam account. An email address is required to create a contact.
In the Name field, type the contacts name. If desired, click the down arrow to select the cursor/highlighting color for the contact on your system. The name in the Name field displays in the shared file (realtime or edit) to indicate the contacts cursor location during RealTeam. If there is no name in the Name field for the contact, then the name/characters up until the @ in the E-mail field will be used as the name for the cursor location.
The Add To My Dict. column is selected for each contact by default. When selected, dictionary defines that the connected clients make are added the host's global table and appropriate dictionary along with the global table and dictionary on their own system. For example, lets say that the witness name is Daniel and the testimony is going fast and instead of writing TKAPB/KWREL, the reporter writes TKAPB/SWR-L. The scopist quickly J-defines the outlines as Daniel and the j-define goes to the reporters Global Table and Job dictionary in addition to the scopists Global Table and job dictionary. If you want the connected participants defines to only go to the hosts Global Table, deselect the option. The status of this option is remembered per participant unless you open the RealTeam Invite dialog box and change it.
The Notes field is for additional information, like the contact's phone number, that would be helpful.
To add another contact, click New again. You can create as many contacts as you want.
-
To invite a contact, place a check mark in the Invite column for the contact or contacts you want to invite and click the Invite button.
When finished creating and inviting your contacts, click Close.
Status Column Information
Offline - the contact is not RealTeam Ready or not logged into RealTeam. You can still invite a contact with an Offline status and once they log in to RealTeam, they will receive the invite.
Available - the contact is online and logged into RealTeam. Availability status is per transcript.
-
Connected - the contact is logged in and connected to the current RealTeam session. If you want to rescind your invite to the contact or disconnect them from the RealTeam session, uncheck the check box in the Invite column of an invited user, the following message displays:
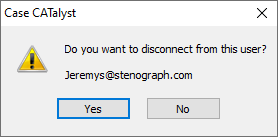
If you select Yes, the contact is disconnected from your RealTeam session.
Declined - the contact received your invitation but selected Decline instead of Accept. If you want to invite the contact again, simply check the check box in the Invite column again.
Unknown - RealTeam cannot determine the status of the contact.
Modify Contacts
To modify a contact's information, highlight the existing contact and then click Modify. Use Tab to move from column to column to modify/add information. Click Modify again to modify another contacts information or click Close.
Delete Contacts
Open a job, then click File, RealTeam Invite to open the Invite dialog box.
Click on an existing contact then click Delete.
-
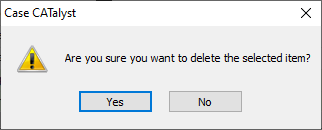
At the Are you sure...message select Yes to delete the contact.
Repeat Step 1 to delete additional contacts or click Close to save and close the dialog box.
Login Settings
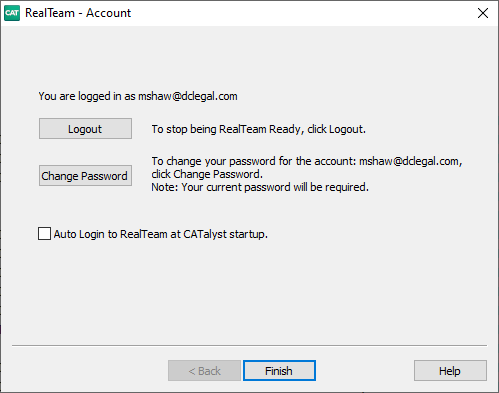
If you are in the RealTeam Invite dialog box and need to log in to RealTeam with different credentials (since CATalyst automatically logs in when you select RealTeam Invite), you can select the Login Settings button. Once the RealTeam - Account dialog box displays, click the Logout button, then log in with the appropriate account e-mail and password and click Finish.
